Well, I have learned that stitchers are a wonderful and loving group that probably has no problem answering this question. Many have stitched for charities and other groups, spending hours of their time to create tokens that remind those in need that they are not alone or forgotten. Their work has translated into money that will be used to save a life or inspire hope. Some have mentored children and taught them the joy of stitching thereby building confidence. Others have shared their stashes with people that haven't the funds to pay rent, much less build a hobby. Others have crossed cultural divides to share a common passion, thereby building bridges.
All in all, stitchers are a generous lot, inclined to sharing and thoughtfulness. And, to quote John Lennon again, "imagine all the people living life in" stitches!!! It would be a grand world, I think. At the very least, it would keep the maladjusted busy!
Wishing all a New Year filled not just with stitching, and stash enhancements but also with continued gererosity and giving...creating a better world, stitch by stitch.
Christina
Friday, December 30, 2011
Tuesday, December 20, 2011
Floss Give-away
Nancy at the Victorian Motto Sampler Shoppe is having a floss giveaway. Check it out! Victorian Motto Sampler Shoppe. What lovely colors...Thanks Nancy for sharing.
Monday, December 19, 2011
Recently finished ornaments
Greetings fellow stitchers! Hope your fingers are busily stitching away and that you are having fun, too. Below are pics of two of my three finishes. I will post pic of the third tomorrow as I am displaying that one on my desk at work.
 Some of you that are members of the Yahoo Group "The Friendly Stitchers", might have heard me wailing about the difficult time I had finishing this into an ornament. Well, here it is. I can criticize where it all went wrong but I won't. The one achievement that I can sincerely talk about is that the pattern called for evenweave fabric and I decided to put this on Aida....the words are supposed to be done over one so that I actually pierced the Aida fibers to make it happen. It actually looks really good, surprisingly so. In case you can't tell, the shape is lop-sided, among other things. This patter is from The Gift of Stitching, November 2011 issue.
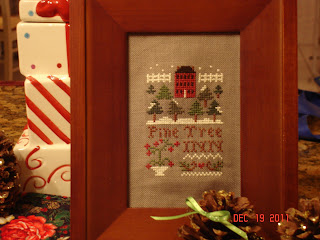 This is the first Little House Needleworks design that I have stitched. Its just adorable. Those of you familiar with the chart will recognize an error...hmmm...where is the error? Its not the thread substitions that I made, as follows: DMC 221 substituted with DMC 3678, DMC 433 substituted with DMC 801, Crescent Colours substituted with DMC 935, 937 and 3051. You can't see it in the picture but I used one thread of shimmery white DMC to lay over the mounds of snow and the snow on the trees so that they glisten.
However did I get my hands on pine cones in Miami?? Funny you should ask, we collected them in the Smoky Mountains on our last trip there in August. The kids decorated them with sparkels and little bows. Its just not Christmas without pine cones!!
 Here is a pic of my tree. It's covered in stitched ornaments and other trinkets. Its not very big but after it's decorated, I think it looks very GRAND!
Mouse, this is one is for you!


However did I get my hands on pine cones in Miami?? Funny you should ask, we collected them in the Smoky Mountains on our last trip there in August. The kids decorated them with sparkels and little bows. Its just not Christmas without pine cones!!

Mouse, this is one is for you!
Wednesday, December 14, 2011
Scrooge in Advertising
I was sitting in my living room, stitching away pleasantly when I looked up during a Best Buy commercial. As I watched, I saw a woman mocking Santa and pretty much just being a bad sport. Apparently, she was feeling very superior because she had "out-done" Santa and had saved a few dollars, too. Not only was she rude but also violent. She felt compelled to actually kick the plastic Santa off of the roof. Have any of you seen this commercial? It's so...so obnoxious. My 9 year-old says to me, "I know Santa is not real, but why is she being so mean?" I told her it was a horrible commercial and there was no explaining it.
Then there's the luxury car commercial ( I have no idea which one, maybe Audi - not Lexus tho). In this commercial, an older son comes home for the holidays carrying bags filled with presents and a cheery happy smile on his face, and just as he is coming in the front door, his older parents sneak out of the house and go for a joy-ride in his car, leaving him in the foyer, calling out to them. Really? I don't know about you, but where I am from, one does not leave one's guests in the foyer without saying SOMETHING.
What's with all the nastiness? Of the two, the anti-Santa one is the most disturbing but the second makes absolutely no sense to me.
There a few commercials that I do enjoy, and those are the happy, warm ones that make me feel all tingly inside. The Publix commercials are at the top of my list, of course, and there is the Jared commercial where the little kid dressed as Santa makes a delivery to his mom...too cute!
Have you any commercials that you hate or love at this season? Do share!
Thursday, December 1, 2011
Christmas Tree Decorating Instructions
I thought to share a few tree decorating ideas that seem to be very effective in getting that "wow" factor. These instructions have been tested in my own home using a real tree. Please do try this at home!
Your ornaments should be mended, whole and in general, in good shape. Lights should be in working order and your tree trimmed (if its natural) or properly splayed out if artificial.
1. Find your Christmas music and put it on. If you haven't any, make one the kids put a hamster on the piano key boards and let it run up and down the boards. The kid needs to provide constant supervision or the hamster may fall to its death and that would make for a crummy tree decorating memory, but maybe a good laugh or two in a few years... maybe not, hard to tell with kids these days.
2. Pour 3:1 parts of eggnog and scotch whiskey into a shaker. Shake until well blended, pour into a glass and take a sip.
3. If using a natural tree, make sure to water it at this time if you haven't done so already.
4. Decorate tree - start with the lights. Test them first! The lights should be the same, that is, the same size, the same style, the same color. If using white, then use all white, if using red, then all red, if using multicolor, then all are multicolor. Start on top and run the first string of lights closer to the trunk. Use as many strings as necessary to wrap around the inside part of the tree. Then take additional lights, beginning at the top, and lay them on the branches, more towards the outside. This will give the tree a layered look of lights and will make your tree glow inside and out! Take a sip of the eggnog.
5. Next, add the garlands. I use beads. You can use smaller diameter beads on the top third, then medium diameter in the 2nd third and larger diameter beads on the lower third. The key is to use the smaller garland towards the top and finish the bottom of the tree with the large ones. I like the effect of the garland hanging in a curve between the branches but you can lay them straighter across the branches. The key is consistency. Lay them in the same way all around the tree. Step back from the tree and make any adjustments necessary and take another sip of the eggnog.
5. Next, start adding the ornaments. Separate the ornaments by size. I pack them away by size so its easier, but if you are not that obsessive, then rummage thru your ornaments and pick out the smaller ones and put those towards the top of the tree. The medium sized ones go in the middle of the tree, and the large ones...you guessed it, they go towards the lower part of the tree. The key is start on top with small and then work your way down the tree finishing with the larger ornaments.
As you are doing all this, take a few steps away from the tree every few ornaments and check on placement; filling any gaps as necessary. If you are getting so called help with decorating the tree, you will want to step back more often and move things around, but do this discreetly so folks don't get all bent and start yelling at you and stomping off. I also advise that you do not allow any drunken guests or family members to help with this crucial evaluation step as I find that their wobbling makes them incapable of determining if anything is off kilter.
6. OK, take one last look and reposition any ornaments or garland until its perfect. Your not done, yet!
7. My sister introduced me to adding little red bows to the tips of the branches. I find that this part is the piece de resistance. Of course, your bows should be a color that complements the general colour theme of your tree. You have two options here, place the bows randomly or place them in rows so that they appear to wrap around the tree like a ribbon or garland. The first method is easier, the second is a nightmare and borders on the psychotic (no offense to those of you out there that are doing it this way as its quite impressive and I am sure that your are not actually psychotic - not that there is anything wrong, necessarily with being psychotic - I think I will stop now). If you decide to try the latter method, you might want to have several sips of the eggnog as you do this and not wait til the end for your treat. Of course, this means that you might have do it all over again if you drink too much!
If placing randomly, the key is to make sure that an ornament hangs from just under the bow. So that as you go around the tree (again, starting from the top) you want to reposition the ornaments to fit on the same branch as the bow so that bow appears to sit on top of the ornament. Very cute! Take another sip of the eggnog. You might need to fix yourself some more eggnog depending on how big your sips have been. You could switch to drinking Ponche Cuba, instead.

8. Place the tree topper on the tree, using whatever methods necessary to make sure the darn thing is on straight and securely.
9. Sweep up the space under and around the tree.
10. Place the tree skirt around the tree. You can now decorate under the tree.
Well, that's it and I hope you find these to be helpful. If you have any suggestions for making these instructions better, please do share!
Your ornaments should be mended, whole and in general, in good shape. Lights should be in working order and your tree trimmed (if its natural) or properly splayed out if artificial.
1. Find your Christmas music and put it on. If you haven't any, make one the kids put a hamster on the piano key boards and let it run up and down the boards. The kid needs to provide constant supervision or the hamster may fall to its death and that would make for a crummy tree decorating memory, but maybe a good laugh or two in a few years... maybe not, hard to tell with kids these days.
2. Pour 3:1 parts of eggnog and scotch whiskey into a shaker. Shake until well blended, pour into a glass and take a sip.
3. If using a natural tree, make sure to water it at this time if you haven't done so already.
4. Decorate tree - start with the lights. Test them first! The lights should be the same, that is, the same size, the same style, the same color. If using white, then use all white, if using red, then all red, if using multicolor, then all are multicolor. Start on top and run the first string of lights closer to the trunk. Use as many strings as necessary to wrap around the inside part of the tree. Then take additional lights, beginning at the top, and lay them on the branches, more towards the outside. This will give the tree a layered look of lights and will make your tree glow inside and out! Take a sip of the eggnog.
5. Next, add the garlands. I use beads. You can use smaller diameter beads on the top third, then medium diameter in the 2nd third and larger diameter beads on the lower third. The key is to use the smaller garland towards the top and finish the bottom of the tree with the large ones. I like the effect of the garland hanging in a curve between the branches but you can lay them straighter across the branches. The key is consistency. Lay them in the same way all around the tree. Step back from the tree and make any adjustments necessary and take another sip of the eggnog.
5. Next, start adding the ornaments. Separate the ornaments by size. I pack them away by size so its easier, but if you are not that obsessive, then rummage thru your ornaments and pick out the smaller ones and put those towards the top of the tree. The medium sized ones go in the middle of the tree, and the large ones...you guessed it, they go towards the lower part of the tree. The key is start on top with small and then work your way down the tree finishing with the larger ornaments.
As you are doing all this, take a few steps away from the tree every few ornaments and check on placement; filling any gaps as necessary. If you are getting so called help with decorating the tree, you will want to step back more often and move things around, but do this discreetly so folks don't get all bent and start yelling at you and stomping off. I also advise that you do not allow any drunken guests or family members to help with this crucial evaluation step as I find that their wobbling makes them incapable of determining if anything is off kilter.
6. OK, take one last look and reposition any ornaments or garland until its perfect. Your not done, yet!
7. My sister introduced me to adding little red bows to the tips of the branches. I find that this part is the piece de resistance. Of course, your bows should be a color that complements the general colour theme of your tree. You have two options here, place the bows randomly or place them in rows so that they appear to wrap around the tree like a ribbon or garland. The first method is easier, the second is a nightmare and borders on the psychotic (no offense to those of you out there that are doing it this way as its quite impressive and I am sure that your are not actually psychotic - not that there is anything wrong, necessarily with being psychotic - I think I will stop now). If you decide to try the latter method, you might want to have several sips of the eggnog as you do this and not wait til the end for your treat. Of course, this means that you might have do it all over again if you drink too much!
If placing randomly, the key is to make sure that an ornament hangs from just under the bow. So that as you go around the tree (again, starting from the top) you want to reposition the ornaments to fit on the same branch as the bow so that bow appears to sit on top of the ornament. Very cute! Take another sip of the eggnog. You might need to fix yourself some more eggnog depending on how big your sips have been. You could switch to drinking Ponche Cuba, instead.
8. Place the tree topper on the tree, using whatever methods necessary to make sure the darn thing is on straight and securely.
9. Sweep up the space under and around the tree.
10. Place the tree skirt around the tree. You can now decorate under the tree.
Well, that's it and I hope you find these to be helpful. If you have any suggestions for making these instructions better, please do share!
General Update
Greetings to all,
Had a bit of a stressful week. Hubby has been ill and spent some time in the hospital but he is better. Now, he just has to believe that he is better ...hee, hee.
My TGOS ornament would have been finished last night except that I didn't have the beads... boy, was I in a funk! I have to finish the Sleigh Ride ornament and another I started last night, LHN Pine Tree House, I think its called. Pics later!
As soon as I am done with those, I am going to start on this needle fob by Shepard's Bush. Its not my typical style but I thought it was too sweet (hence the name, sweet stitches fob!).

I am not too sure how to make the ribbon ruched like that. Are there any good tutorials out there?
Thank you for visiting and hope your week is going well! Blessed Be!
Sunday, November 27, 2011
Ornaments, Past and Present
Hello friends,
I thought to post a few pics of ornaments. My sister, who is a very talented stitcher, made the teacups. You might be able to see the tiny pewter charms in the shape of tea bags that she attached just under the bows on the tea cup ornaments. Just precious!
 This is the lovely ornament that I received from my exchange partner, Dianne, in Canada. It's done in a lovely variegated teal floss and its very unique...I love it. Thank you, Dianne.


 This one is done over one, so this it is very small and cute. =)

 You can see the little tea bag in this one.
 This is the one from TGOS that I am doing over Aida. The words are supposed to be done over one. Its been quite a challenge but its turning out OK.
 Isn't he cute? This one is from the Cross Stitch and Needlework magazine, a few years ago. It's done on a pale blue fabric.

 My sister made this one, too.
 A freebie from somewhere? Using DMC variegated in a deep red/burgundy.
 This one is from the 80's.

Well, that's my little trip thru the years in ornaments. Ornaments are a great way of seeing the evolution of style over the years. I like to think that my daughters will pass these on to their daughters. How many years does your ornament collection span?
I thought to post a few pics of ornaments. My sister, who is a very talented stitcher, made the teacups. You might be able to see the tiny pewter charms in the shape of tea bags that she attached just under the bows on the tea cup ornaments. Just precious!


I received this one and the following two from my exchange partner Kate. She couldn't decide which one to send so she sent three. They are just too cute. The purple one above has sparkly thread in the star and around the lettering. Thank you so much for these, Kate!


These two little stocking will feel right at home amongst my other stockings!


From the 90's.
Well, that's my little trip thru the years in ornaments. Ornaments are a great way of seeing the evolution of style over the years. I like to think that my daughters will pass these on to their daughters. How many years does your ornament collection span?
Sunday, November 20, 2011
Christmas Ornament just finished
Greetings to my stitchy friends out there! I finished a Christmas Ornament from the November issue of The Gift of Stitching emagzine. I have also posted pics of a few WIPs and another finished Christmas Ornament. I will likely spend the next few weeks stitching ornaments and cards so these WIPs are just going to have wait!


This is the little one from Michael's craft store.

This is the one from TGOS - Gingerbread Christmas. I made a few substitutions. Just too cute!

This one is from Little House Needleworks - Brave Hearts. I've substituted with Vicky's Hand-dyed Fibers. Stitched on Aida 14 count, Flax, I think.

This is one I started in October intending to have finished it my Thanksgiving, but I am nowhere near completion.Chart is by Lettie Eckberg of The Needle's Notion, published in Oct. 2007 The Cross Stitcher magazine. See below for progress.

I have substituted with Vicky's Hand-dyed Fibers which makes for a much more subtle effect.
Anyway, that's it for now. Hoping to have a few more ornaments completed in another week! Wishing all a wonderful stitching time.
Christina G
Wednesday, November 16, 2011
Thanksgiving Day
I always prefer a bit of a funky menu at the Thanksgiving meal. This is primarily so because growing up in a Cuban-American household, we would have roast port, black beans and rice and the ever ubiquitous boiled cassava. As children of immigrants, we were definitely thankful for the opportunities, even if the gratefulness was a bit marred by resentment of the prejudice and rejection we faced constantly. Still, we knew that here, in the United States, we could at least have "a go" at real success. Our school mates were children of immigrants, too. They were, amongst others, Polish, Peruvian, Irish, Russian, Pakistani, Italian, Vietnamese, Ecuadorian, Korean, and Egyptian. When Thanksgiving Day came around, their tables were invariably filled with foods reminiscent of their own motherlands but always included some "American" dish. At our house it would be a pumpkin pie.
These days, my Thanksgiving table is more traditionally "American". We have string bean casserole and dinner rolls and of course, a gigantic over-cooked turkey. My mother-in-law brings the most fabulous sweet potato concoction with marshmallows and brown sugar ever made. My kids enjoy the American ubiquitous food.... macaroni and cheese. And now, instead of a token "American" food, we have a token Cuban food, something I know my Father would have enjoyed, such as sweet plantains or turron.
No matter how our Thanksgiving menus may have evolved, however, there are somethings that haven't changed; that is, the love, humility and hope that is felt by all sitting around the table, on the wonderfully American Thanksgiving Day.
Wednesday, November 9, 2011
Farewell, little hamsters...sniff, sniff
A local pet shop was willing to take the baby hamsters out of my hair. I gave up the Dad, (heart break), but my daughters wanted to keep the girls. So I gave up Daddy, two brothers and a sister and kept Mommy and 2 sisters. The shop proprietor was happy to get the hamsters for free and I was happy they would find a good home. One of the workers fell in love with He-man and so he was going to take it home to his girlfriend, who is a hamster lover as well. I also got 20% off of the purchases made that day, so all in all, a very good deal.
Hopefully, none of the female hamsters are pregnant. The pet shop proprietor told me they could get pregnant by day 45. Yikes!
Hopefully, none of the female hamsters are pregnant. The pet shop proprietor told me they could get pregnant by day 45. Yikes!
Update
Hello to all,
I was eventually able to get to the post office to ship the magazines to the winners. Elaine, from Ireland and Mary Joan from the UK will hopefully receive their magazines over the next few weeks.
I have finished both ornaments for the exchanges that I am participating in, one is for the Friendly Stitchers yahoo group and the other for The Gift of Stitching yahoo group. I want to keep the ornaments for myself, but won't. I think they turned out beautifully, but I am biased! I've already started another two ornaments for myself.
 This is just a little cheapo ornament I bought at a Michael's craft shop. I enjoy making these little ones because they are great for filling up the empty spots on a tree and are a quick finish. Each of my daughters is also making one.
 This one started out for an exchange but it is just too big. The pattern is by Praiseworthy Stitches and published in the 2011 Just Cross Stitch Christmas Ornament Issue. I am deleting the front horse...just because. The fabric is one of my own hand-dyed "experiments" and I think it looks nice. How shall I finish it?
I was eventually able to get to the post office to ship the magazines to the winners. Elaine, from Ireland and Mary Joan from the UK will hopefully receive their magazines over the next few weeks.
I have finished both ornaments for the exchanges that I am participating in, one is for the Friendly Stitchers yahoo group and the other for The Gift of Stitching yahoo group. I want to keep the ornaments for myself, but won't. I think they turned out beautifully, but I am biased! I've already started another two ornaments for myself.


Wednesday, November 2, 2011
Hamster Juveniles
Hi there, here are a few pics of the pups, pretty much all grown up. Now to decide whether to keep all or just some of one sex.
 Just look at that profile...the result of good breeding.
 They just love romaine lettuce and carrots.
 No comment!
 And here is Dad chewing on a carrot. He's gotten quite plump.
I had purchased a type of corral (pictured above) that would hold them in but allow them some room to roam around...Problem is that they managed to climb the fencing and at one point, I had 4 loose hamsters running about the house. It was fun chasing after them and trying to corner them all. They were successfully captured and the stupid corral returned for a full refund. I think that I will have to invest in more habitats and connecting tubing in order to give the little critters some semblance of a quality life...wait, did I just say "invest in more habitats and connecting tubing"? Oh no, its happening...must resist, must fight..it..must..


I had purchased a type of corral (pictured above) that would hold them in but allow them some room to roam around...Problem is that they managed to climb the fencing and at one point, I had 4 loose hamsters running about the house. It was fun chasing after them and trying to corner them all. They were successfully captured and the stupid corral returned for a full refund. I think that I will have to invest in more habitats and connecting tubing in order to give the little critters some semblance of a quality life...wait, did I just say "invest in more habitats and connecting tubing"? Oh no, its happening...must resist, must fight..it..must..
Wednesday, October 26, 2011
Pinwheel Ponders: Three Sided Ornament Tutorial
Pinwheel Ponders: Three Sided Ornament Tutorial
There are some lovely finishing ideas on this blog, as well as clear tutorials. I just discovered this and thought, gee, too bad I didn't find this earlier so I wanted to share with you all.
Hugs - Christina
There are some lovely finishing ideas on this blog, as well as clear tutorials. I just discovered this and thought, gee, too bad I didn't find this earlier so I wanted to share with you all.
Hugs - Christina
Thursday, October 20, 2011
Hamster Babies
Hello everyone,
Wanted to share a picture of the hamster babies. It's been a fascinating thing to watch them mature. At about day 14, some of the babies were noted to be eating hamster food that She-ra had brought to their nest. At about day 17, they were all eating solid food and She-ra had been decreasing their nursing time. This is also the day that they started opening their eyes for any length of time. Fortunately, when I took this picture today (day 18) they were not yet fully weaned and I managed to snap this pic of the little family nursing. Very cute. There are 5 babies and one of babies is rather a go-getter. It runs around looking for food and things to climb, careless of its siblings that may be underfoot. There is one that is the opposite, more of a runt. Its the smallest and most likely to cry out to its dam for a bit of nursing - its also unlikely to run around the cage, preferring to eat whatever is laying in its vicinity within VERY easy reach. I didn't think it would make it, but it did...the squeeky hamster gets the nurturing?

Wanted to share a picture of the hamster babies. It's been a fascinating thing to watch them mature. At about day 14, some of the babies were noted to be eating hamster food that She-ra had brought to their nest. At about day 17, they were all eating solid food and She-ra had been decreasing their nursing time. This is also the day that they started opening their eyes for any length of time. Fortunately, when I took this picture today (day 18) they were not yet fully weaned and I managed to snap this pic of the little family nursing. Very cute. There are 5 babies and one of babies is rather a go-getter. It runs around looking for food and things to climb, careless of its siblings that may be underfoot. There is one that is the opposite, more of a runt. Its the smallest and most likely to cry out to its dam for a bit of nursing - its also unlikely to run around the cage, preferring to eat whatever is laying in its vicinity within VERY easy reach. I didn't think it would make it, but it did...the squeeky hamster gets the nurturing?

Magazine giveaway
Greetings to all,
I have extra copies of Just Cross Stitch Christmas Ornaments 2011 issue and the November 2011 Cross Stitch & Needlework magazine. I'd like to send them to someone that can use them and with November quickly coming upon us, I'd like send these out by the 31st of October. I don't know how to do a drawing in a fancy way and won't be making it too hard, just let me know which one you would like, become a follower of this blog (if you aren't one already). I shall assign a number to all the names and use a random number picker to choose. Please use the comment feature to let me know which one you would like, and leave an email where I can contact you. Thank you and have a wonderful Holiday stitching time.


I have extra copies of Just Cross Stitch Christmas Ornaments 2011 issue and the November 2011 Cross Stitch & Needlework magazine. I'd like to send them to someone that can use them and with November quickly coming upon us, I'd like send these out by the 31st of October. I don't know how to do a drawing in a fancy way and won't be making it too hard, just let me know which one you would like, become a follower of this blog (if you aren't one already). I shall assign a number to all the names and use a random number picker to choose. Please use the comment feature to let me know which one you would like, and leave an email where I can contact you. Thank you and have a wonderful Holiday stitching time.


Tuesday, October 18, 2011
Announcing Kathy Ellen's Stash Giveaway
Hello, if you haven't checked Kathy's blog out, you should. Mostly because you really aught to see her work. She stitches beautifully and her up-close and personal pics of her work are a treat to view (no squinting of the eyes), but also because of her stash giveaway that she is offering. You've only got til the 28th of October to join in the fun so here is the blog link: http://astitchersheirlooms.blogspot.com/
Good luck and best regards to all - Christina
Good luck and best regards to all - Christina
Thursday, October 13, 2011
Feeling Crappy
Ever been so sick you have no control over anything at all? Not what you eat or where you go? That's a great feeling isn't it? If you have lived this long and have not been that ill, consider yourself blessed and beloved by the great Divinity. If not and have managed to survive, then you are blessed as well, if perhaps not in the same porportion as the first group. I am currently recovering from an acute bout of an illness that has left me more conscious of just how well I really am. That's right, of how well I am. All the bits are there (if not in perfect working order), and I don't suffer from debilitating pain and my wits are fine (or so the voices in my head insist). This illness was accompanied by extreme pain...the only relief coming from strong narcotics that left me practically unconscious - oh the lovely (albeit temporary) reprieve that is found in the abyss. It is humbling to be ill, but also empowering...I tend to feel angry when ill, wanting to strike back and get well quick and not be sick again, ever.
I suspect that Adolf Hitler or the like, would not have suffered from delusions of grandeur if he had been subject to KIDNEY STONES!!!!
I suspect that Adolf Hitler or the like, would not have suffered from delusions of grandeur if he had been subject to KIDNEY STONES!!!!
Tuesday, October 4, 2011
Halloween Ornie Finished
Greetings,
I've just finished up a Halloween ornie from Just Cross Stitch magazine, September 2008 issue. I used dove gray 14 count Aida and silks from Hand Dyed Fibers. I used DMC 608 for the cording and a bit of ribbon for the hanging cord. I stuck a little plastic spider to cover the rather sloppy glue at the bottom. Not bad for quick finish. Take a look.

Hand Dyed Fibers as follows: Old Maid of the Night, BeCreamed, and Mahogany.
Sunday, October 2, 2011
Baby Hamsters
Well, if finally happened. She-ra gave birth this morning to 5 pups (not sure that is the term for rodent babies). We stuck He-man into the ball and ran out to Pet Supermarket to buy him a temporary habitat. It was rather strange to see She-ra dragging the pups around by their heads, but I assumed she knew what she was doing. She finally settled down to nursing, cleaning them and sleeping. Oh, the joys of taking care of newborns. I have to admit that I am not prepared to house an additional 5 hamsters...but I've a plan.
Saturday, October 1, 2011
Finished 10 minutes ago!!!
Hello fellow stitchers...I don't have to go on and on about the joys of completing a project; especially one that has taken a really long time. I have just finished the Halloween Fairy. She's been 99% completed for a while except for the beading in the moonbeams and around the hem of her dress. I just couldn't bring myself to finish her, but I just buckled down and voici! I thought about stitching in some wings but thought it might be a bit too much what with all the beads around her head and shoulders. Frankly, I think that the design has too many beads...a perfect example where less would have been more. Still, a lovely design. This was published in September 2008 issue of Cross-Stitch & Needlework Magazine and designed by Nora Corbett.
I am now debating whether I should invest even more money in having it professionally framed or try framing it myself?
 I'd treat myself to an icecream as a reward for my discipline but I am dieting. I will have a bit of sherry, instead.
I am now debating whether I should invest even more money in having it professionally framed or try framing it myself?

Friday, September 30, 2011
Stash Giveaway
Greetings to all,
I have entered a giveaway and one of the rules for participating is to spread the news about the give away ...hmmm...thus diminishing my own odds of winning, but that's ok, the more the merrier. This paricular give away is for lot's of Halloween treats by a wonderful stitcher. Go check out her blog...now! Here is the link to her blog - http://www.takingonestitchatatime.blogspot.com/. Thank you.
I have entered a giveaway and one of the rules for participating is to spread the news about the give away ...hmmm...thus diminishing my own odds of winning, but that's ok, the more the merrier. This paricular give away is for lot's of Halloween treats by a wonderful stitcher. Go check out her blog...now! Here is the link to her blog - http://www.takingonestitchatatime.blogspot.com/. Thank you.
Tuesday, September 27, 2011
Cranky!
I got home from work yesterday feeling tired and short-tempered. The drive home took longer than usual and I was cranky (all over). I walked thru the front door and my kids were still working on their home work (sort of). I became quite exasperated because I had previously told them to make sure it was done by the time I got home. Well, I took a deep breathe, smiled at them, gave them hugs and asked what they had done that day. In a matter of seconds, I felt better. Their chirpy little voices making me feel good (all over). Of course, an ounce of Pinch Scotch worked wonders, as well.
After fixing a quick dinner of spaghetti and meatballs (where would we be without spaghetti and meatballs??) we sat around the table and discussed the plans for the forthcoming days and the projects and tests that they were preparing for. A headache started coming on but onward I pressed.
After dinner, the kids and I retired to my sewing room so they could complete their homework in my ever watchful presence and I could work on my Halloween Fairy. We chatted and laughed and giggled and managed to complete the home work - eventually - and made quite a dent in the Fairy.
It was a rather late night for the girls, as they were up until 9 pm, but all in all, we had a lovely time together. My eldest even managed to lay down a few beads - about which she was very excited. I sat in my chair and looked down at the girls, which were on the floor working on their various assignments, and I felt an utter sense of peace and contentment and yes, accomplishment. I found myself thinking, that life didn't get much better than this. It had been an absolutely perfect evening, headache and all.
Sunday, September 25, 2011
Stash Additions
Here is a pic of my latest addition to my stash. There are two magazines - do these counts as stash enhancers? And a Mill Hill Bead kit, a scared cat chart and a lovely scissor fob. Oh, there just isn't enough time do all that I want. I'll have to stop doing unimportant things such as bathing and eating (I've already given up sleep).


New Deliveries from Polstitches Designs and Maureen in Ayr, Scotland
Greetings to all!
I came home Friday to two packages. One was filled with fabric from Polstitches Designs. I purchased the pink fabric and a grab bag. This grab bag was filled with medium size pieces not one of which was ornament sized. I am very pleased with the grab bag, the bit of pink that I purchased and the delivery. The fabric was neatly packaged...not very neatly cut but I cut them all straight and used Fray Check glue to keep the threads from fraying. Here is the link to the company: http://polstitchesdesigns.co.uk/ The other package was a book that a fellow Yahoo group member sent me, by the name of Maureen. It's filled with lovely designs suitable for embellishing items.
 This color is called Cuddles. Its a baby pink with swirls of white showing thru. I will be using this for a neele keep that I am making for my self.
 This one is from the grab bag. It's linen and I believe the color is "Marbelled Rose."
 This one might be "Fairy Footprints".
 I think this is "Shimmering Seas".
 This might be "Sniff and Sneeze".
 This one might be "Addiction".
 And this last one I believe is "Fairy Dreams".
As you can imagine, I have many designs that I can put on these and can't wait to get started! I might be able to put some of the designs from the book on to some of these bits of fabric.

I came home Friday to two packages. One was filled with fabric from Polstitches Designs. I purchased the pink fabric and a grab bag. This grab bag was filled with medium size pieces not one of which was ornament sized. I am very pleased with the grab bag, the bit of pink that I purchased and the delivery. The fabric was neatly packaged...not very neatly cut but I cut them all straight and used Fray Check glue to keep the threads from fraying. Here is the link to the company: http://polstitchesdesigns.co.uk/ The other package was a book that a fellow Yahoo group member sent me, by the name of Maureen. It's filled with lovely designs suitable for embellishing items.


As you can imagine, I have many designs that I can put on these and can't wait to get started! I might be able to put some of the designs from the book on to some of these bits of fabric.

Saturday, September 24, 2011
Found Hamster!
She-ra did come out late last night. My husband saw her running back into a hole in the cabinet, which we had no idea was there. We blocked her escape from the kitchen with a table leaf and put a plate of bananas on the floor, turned out the lights and in a few minutes, she came out. My kid caught her and just like that, she was put back into the repaired habitat. Poor thing was very stressed out and thirsty and hungry. She behaved rather oddly all night. She climbed and ran around the habitat like a crazy hamster. She is much calmer this morning. We are glad she came out and she is "home" again.
Friday, September 23, 2011
Lost Hamsters
Well, it happened. We awoke this morning to find He-man and She-ra missing. Apparently, they have been gnawing on the bars and one of them got loose and fell into the habitat, allowing them to crawl out. He-man was found in the garbage bin cabinet which happens to be closed at all times so how he managed to get in there remains a mystery. She-ra is still MIA. We have searced everywhere but we don't know how to think like a hamster, yet. I am hoping that as night falls, she will rouse herself and search out food and water. My kids cried all morning. She-ra, if you can read this, we love you, come home, please.
Monday, September 19, 2011
First Attempts at dyeing fabric
Happy Monday to all.
I wanted some purple and orange fabric and thought to dye it myself. I collected a few pieces of fabric from my stash to conduct my first experiments. I used Rit and Tintex powdered dyes. I followed the directions published by Rit Dye for low-water immersion. Here is the link to the Rit Dye techniques - http://www.ritdye.com/dyeing-techniques . Here is the site for Tintex. They produce other products as well, such as paints.http://www.tintex.com.au/ .Tintex also had a link to another web site that would answer questions related to dyeing: http://www.pburch.net/dyeing.shtml. This last site has gobs of information and I can't wait to study what is on this site.
The results you see below were achieved quickly, with little to no measuring. I did make the following mistakes: I placed my fabric too close to the mixing bowl and did get powdered dye on the fabric (hence the tiny little purple spot on the periwinkle fabric). When using bleach, be very careful to dilute the bleach before using so you do not get concentrated bleach spots on the fabric (hence the white spots on the dark purple fabric). More on how I achieved the effects in the captions following the pics. I recommend that you try this at home. Its very simple, requires little to no set up and the results are practically instantaneous. Next, I will be trying to figure out how to get a mottled effect with two or more colors while still keeping the colors pure.
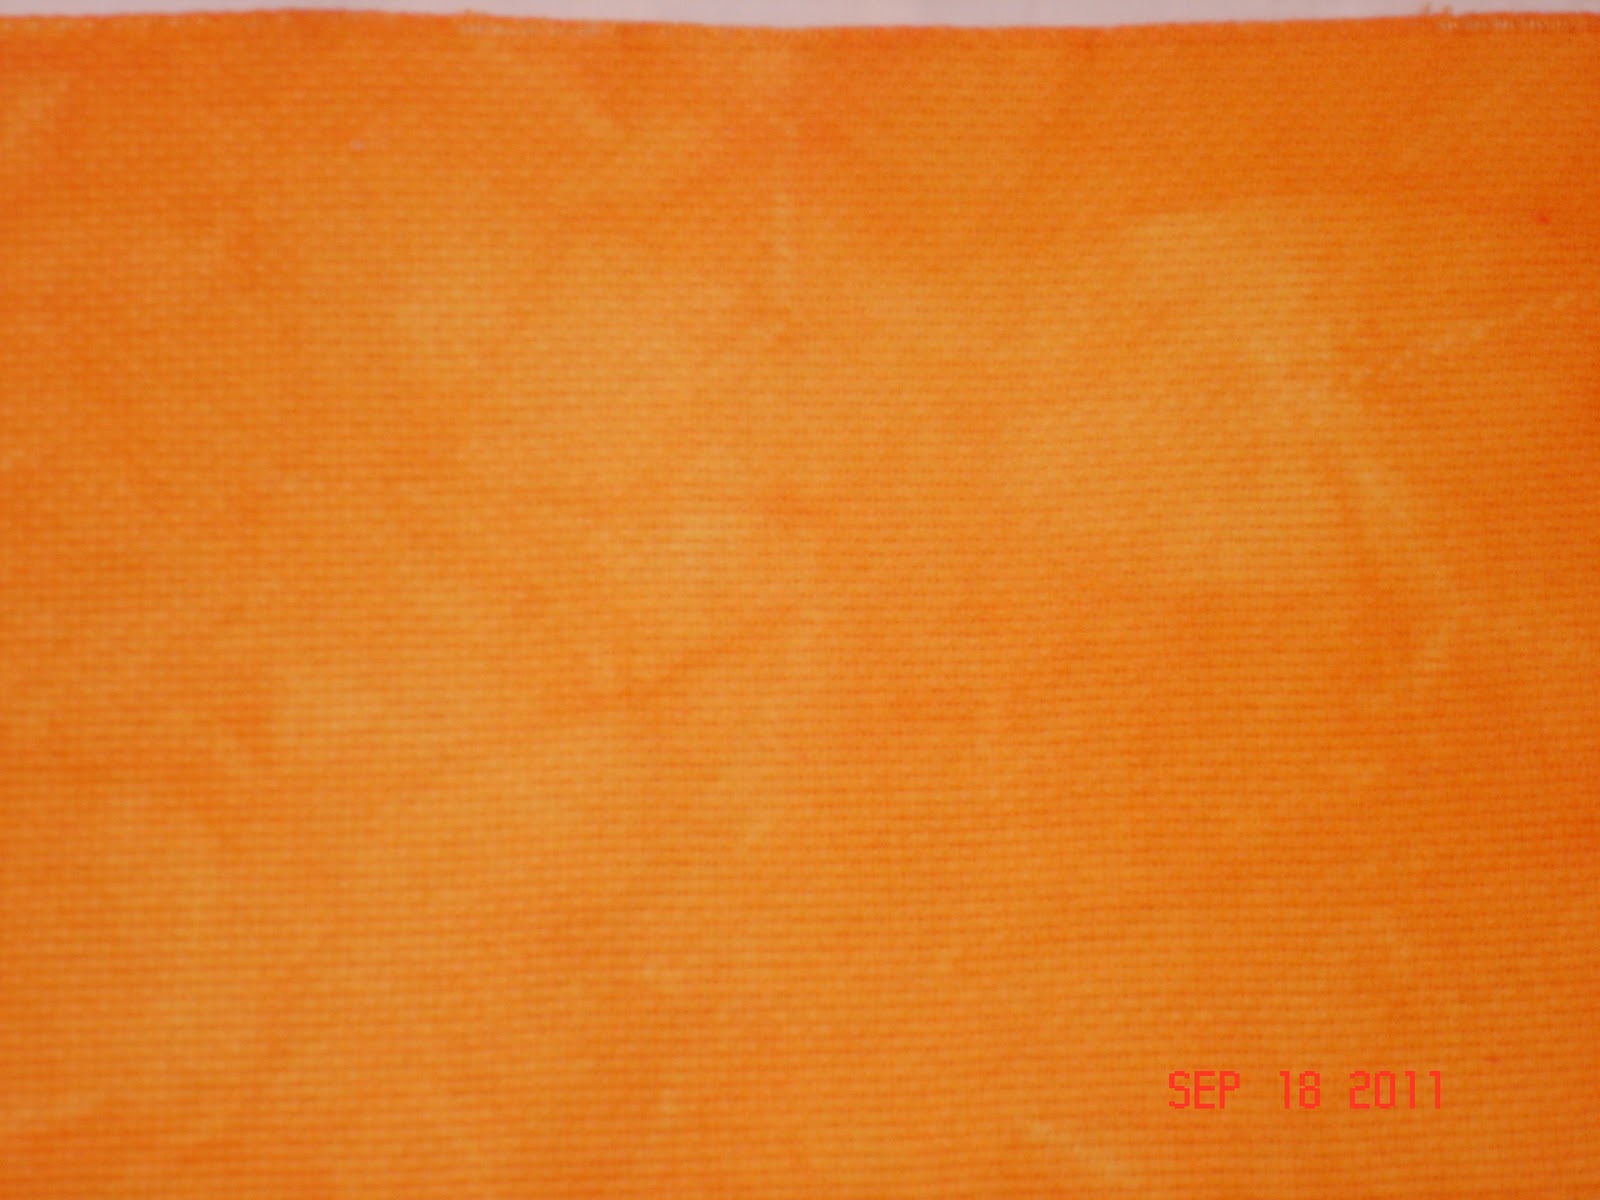
 This is a mottled orange. I used Tintex yellow and red, mixed it by sprinkling tiny little amounts of the powder, alternating between the red and the yellow until I got the colour I wanted. I used a white plastic spoon to mix and lift a little into the light. I did this more like an artiste than a chemist, so no measuring here. I only used about 1-1/2 cups of hot water, smooshed the wadded up material into the dye and microwaved for 1 minute. I had a lot of white areas after rinsing it so I stuck it back in the dye bath for another turn and voila a lovely orange! I am calling this "Oh No you didn't".
 I wanted this to be a bit more purple but I sprinkled in to much royal blue and didn't want to keep adding purple because I did not want a darker color, so I left it the way it was. I used Rit Dye in Royal Blue and Purple and the same sprinkle method as used for "Oh No you didn't". If you look closely at the top, you will see one little purple spot. Not sure how this happened but I think I got some of the purple powder on it as I was tearing the package open (use scissors!). Despite the spot, I just love this color. I am calling this one "What are you looking at?"
 I used Rit Dye in Purple here and used a teaspon of dye, as I wanted a very, very deep color. Of course, a teaspoon was way too much! I then diluted a little bleach (2;1 bleach:water) and dabbed it with a sponge while the fabric was still wet. I sprayed diluted bleach on the fabric too, and that's how I got the little white spots towards the top. I was very upset but then realized that they looked like stars, so I will put a crescent moon next to the spots and it will look like the spots were intended. I am calling this one "You there, come here!". When using bleach (not recommended) be sure to rinse and rinse as the bleach will eat away at your fabric over time. Time will tell what this piece will look like in a few years.
The two purple pieces were Lugana and the orange is Aida. I like the way the Aida "grabbed" the dye and survived the rough handling. The Lugana fuzzed up a bit from all of the handling and became very soft. I was a bit more gentle with the periwinkle piece so it did not fuzz up as much.
OK, so that's it for now. Have a go at this and see how much fun it is! Let me know if you try dyeing for yourself and share your results with me, please.
Happy Stitching!
I wanted some purple and orange fabric and thought to dye it myself. I collected a few pieces of fabric from my stash to conduct my first experiments. I used Rit and Tintex powdered dyes. I followed the directions published by Rit Dye for low-water immersion. Here is the link to the Rit Dye techniques - http://www.ritdye.com/dyeing-techniques . Here is the site for Tintex. They produce other products as well, such as paints.http://www.tintex.com.au/ .Tintex also had a link to another web site that would answer questions related to dyeing: http://www.pburch.net/dyeing.shtml. This last site has gobs of information and I can't wait to study what is on this site.
The results you see below were achieved quickly, with little to no measuring. I did make the following mistakes: I placed my fabric too close to the mixing bowl and did get powdered dye on the fabric (hence the tiny little purple spot on the periwinkle fabric). When using bleach, be very careful to dilute the bleach before using so you do not get concentrated bleach spots on the fabric (hence the white spots on the dark purple fabric). More on how I achieved the effects in the captions following the pics. I recommend that you try this at home. Its very simple, requires little to no set up and the results are practically instantaneous. Next, I will be trying to figure out how to get a mottled effect with two or more colors while still keeping the colors pure.


The two purple pieces were Lugana and the orange is Aida. I like the way the Aida "grabbed" the dye and survived the rough handling. The Lugana fuzzed up a bit from all of the handling and became very soft. I was a bit more gentle with the periwinkle piece so it did not fuzz up as much.
OK, so that's it for now. Have a go at this and see how much fun it is! Let me know if you try dyeing for yourself and share your results with me, please.
Happy Stitching!
Subscribe to:
Posts (Atom)